How to Install an Under-Sink Water Filter: A Step-by-Step Guide
Installing an under-sink water filter is a practical way to improve the quality of your drinking water by removing contaminants and impurities. This guide will walk you through the installation process, provide useful tips, and answer common questions.
Why Install an Under-Sink Water Filter?

- Improved Water Quality: Removes chlorine, lead, sediment, and other harmful substances.
- Convenience: Provides filtered water directly from your kitchen tap.
- Cost-Effective: Saves money compared to buying bottled water.
Tools and Materials Needed
| Item | Purpose |
|---|---|
| Adjustable wrench | To tighten fittings |
| Drill | For mounting the filter bracket |
| Screwdriver | To secure screws |
| Teflon tape | To ensure leak-proof connections |
| Bucket or towel | To catch any water spills |
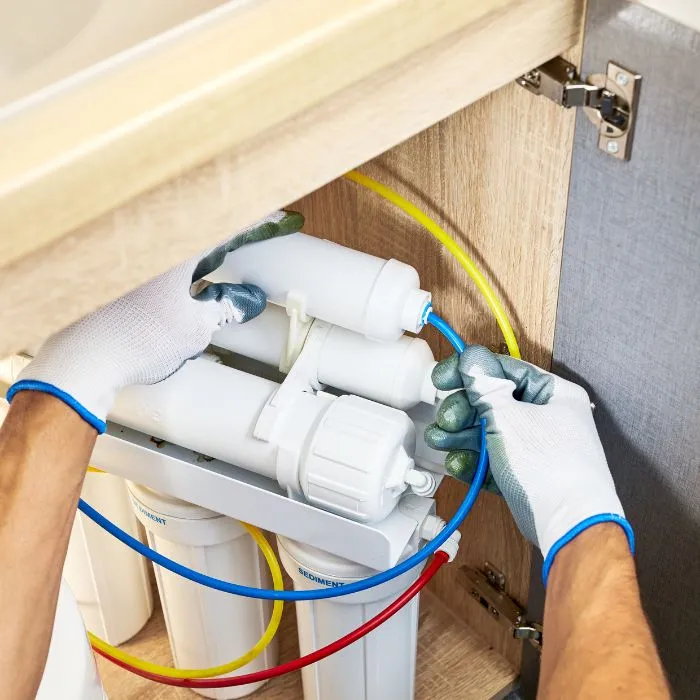
Step-by-Step Installation Process
-
Turn Off the Water Supply
Locate the cold water valve under the sink and turn it off to prevent water flow during installation. -
Prepare the Area
Clear out the cabinet space under the sink for easy access. -
Install the Filter Bracket
Use a drill to mount the filter bracket on the cabinet wall, ensuring it is secure and accessible. -
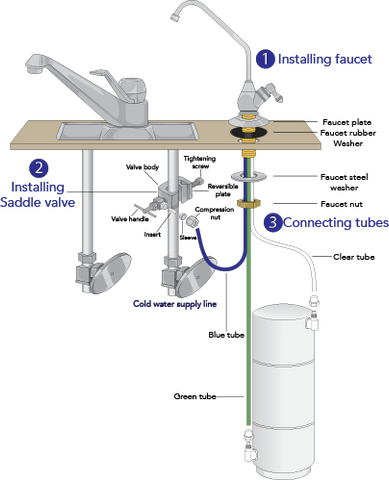
Connect the Water Supply Line
Detach the cold water line from the faucet and attach the filter’s inlet hose using an adjustable wrench. Use Teflon tape on threaded connections to prevent leaks. -
Attach the Outlet Hose
Connect the filter’s outlet hose to the faucet or dedicated filtered water tap. -
Check for Leaks
Turn the water supply back on and inspect all connections carefully. Tighten any fittings if necessary. -
Flush the Filter
Run water through the filter for 5-10 minutes to clear out any carbon dust or impurities.
Maintenance Tips
- Replace filter cartridges as recommended by the manufacturer, typically every 6-12 months.
- Regularly check for leaks or drips.
- Clean the filter housing during cartridge changes.
Frequently Asked Questions (FAQ)
Q1: How long does installation take?
A: Typically, 30 to 60 minutes depending on your plumbing setup.
Q2: Can I install the filter myself?
A: Yes, most under-sink filters are designed for DIY installation with basic tools.
Q3: What if I notice a leak after installation?
A: Turn off the water supply immediately and check all connections. Re-tighten fittings or apply more Teflon tape as needed.
Q4: Will the filter reduce water pressure?
A: Some minor pressure reduction is normal, but it should not significantly affect your water flow.
Conclusion
Installing an under-sink water filter is a straightforward project that can greatly enhance your water quality and convenience. With the right tools and careful attention to each step, you can enjoy clean, filtered water right from your kitchen tap.
Feel free to use this guide as a reference for your blog article to ensure it is informative, engaging, and optimized for search engines!