Septic Tank Installation Checklist for Homeowners
Installing a septic tank is a crucial step for homeowners who rely on onsite wastewater treatment. Proper installation ensures efficient operation, environmental safety, and longevity of the system. This detailed checklist will guide you through the essential steps and considerations for a successful septic tank installation.
1. Understand Local Regulations and Permits
Before beginning installation, research local health department regulations and obtain necessary permits. Regulations vary by location and may dictate tank size, placement, and inspection requirements.
| Task | Details |
|---|---|
| Check zoning laws | Confirm if septic systems are allowed |
| Obtain permits | Apply for installation and inspection permits |
| Schedule inspections | Coordinate with local authorities |
2. Site Evaluation and Soil Testing
A professional site evaluation is essential to determine soil suitability. Soil percolation tests assess how well the soil absorbs and filters wastewater, influencing drain field design.
- Hire a certified soil tester
- Conduct percolation and soil profile tests
- Analyze groundwater levels
3. Choose the Right Septic Tank
Selecting the appropriate tank size and material is vital. Factors include household size, water usage, and soil conditions.
| Tank Material | Pros | Cons |
|---|---|---|
| Concrete | Durable, long-lasting | Heavy, may crack over time |
| Plastic | Lightweight, corrosion-resistant | Less durable, can float if not anchored |
| Fiberglass | Lightweight, strong, corrosion-resistant | More expensive |
4. Plan the Installation Layout
Design the system layout considering tank location, drain field placement, and access for maintenance. Ensure compliance with setback distances from wells, buildings, and property lines.
- Mark tank and drain field locations
- Plan for future access and repairs
- Avoid areas prone to flooding or heavy traffic
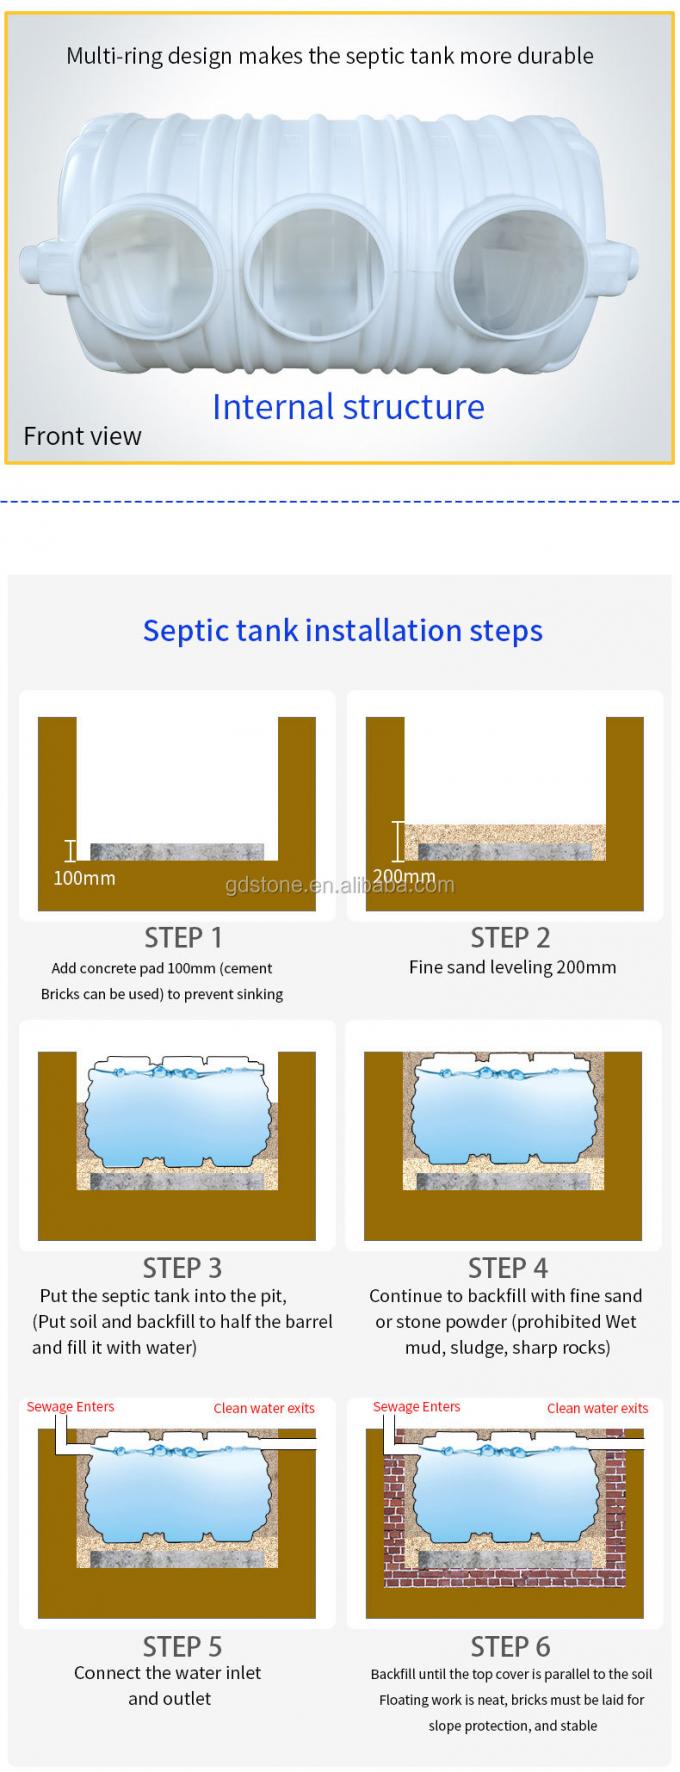
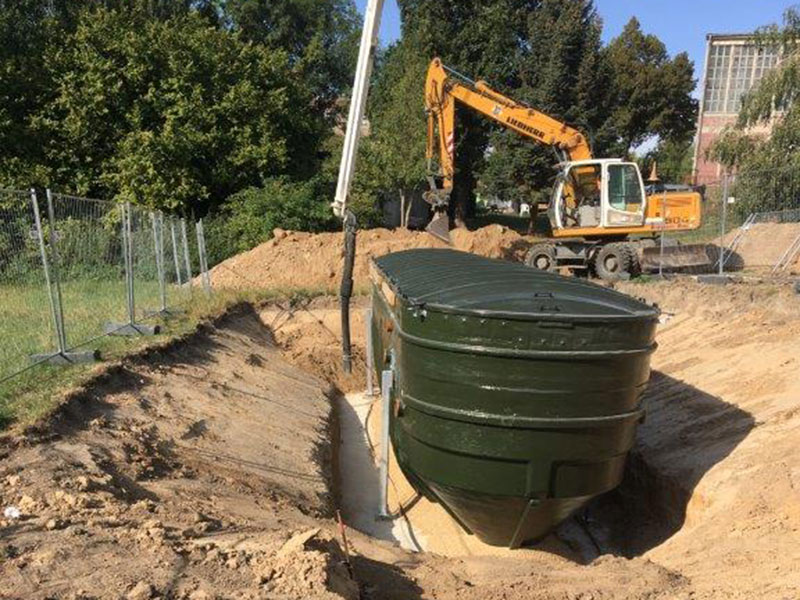
5. Installation Process
- Excavate the site according to the layout plan
- Level and prepare the base for the tank
- Install the tank and connect inlet and outlet pipes
- Backfill carefully to avoid damage
6. Final Inspection and Testing
After installation, schedule a final inspection to verify compliance. Conduct water tests to ensure the system is functioning properly.
- Check for leaks and proper flow
- Verify tank ventilation
- Confirm drain field performance
7. Maintenance Tips for Longevity
Regular maintenance extends the life of your septic system.
- Schedule pumping every 3-5 years
- Avoid flushing harmful chemicals
- Monitor water usage
- Inspect system annually
Frequently Asked Questions (FAQ)
Q1: How deep should a septic tank be installed?
A: Typically, septic tanks are buried 4 to 5 feet underground, but depth depends on local codes and soil conditions.
Q2: Can I install a septic tank myself?
A: Installation requires permits and professional expertise to ensure safety and compliance.
Q3: How often should a septic tank be pumped?
A: Generally, every 3 to 5 years, depending on usage and tank size.
Q4: What signs indicate septic system failure?
A: Slow drains, odors, wet spots near the drain field, and sewage backups are common indicators.
By following this checklist, homeowners can ensure a smooth septic tank installation process that meets regulatory standards and promotes system efficiency and durability.